Table of Contents
Settings page allows configuring email verification system settings and all other settings related to email verifier pro and its add-ons. Before using send mail and email validation make sure to set up both of their settings so your email gets verified and send without any issues.
GENERAL #
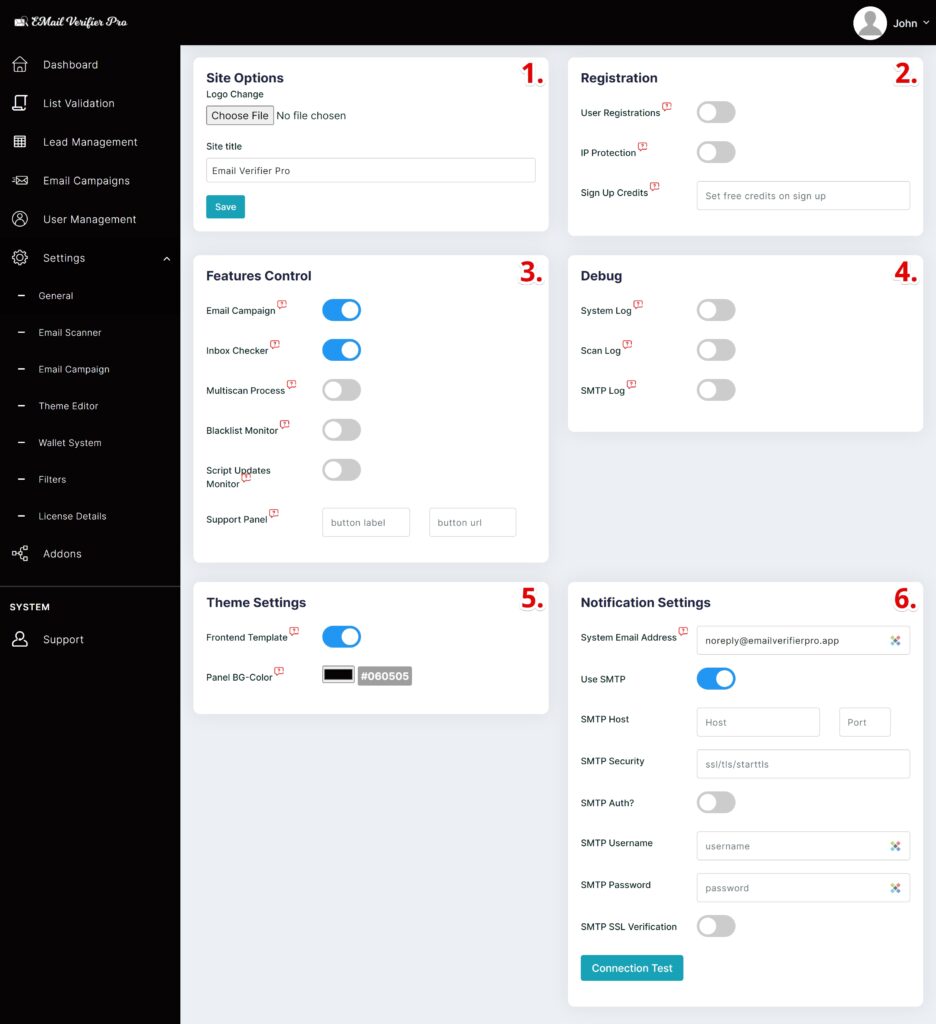
- Site Options [In SaaS Only] –
- Logo Change: Replace site-wide logo.
- Site Title: Update site title.
- Registration [In SaaS Only] –
- User Registrations: Control user registration gate.
- IP Protection: Disable duplicate IP registration on system.
- Block Domain: Disable specific domain signup.
- Sign Up Credits: Set a fixed amount of free credits during sign up for users.
- Features Control –
- Email Campaign: Control email campaign feature.
- Inbox Checker: Control Inbox Checker feature.
- External Server: Control External Server feature. [more]
- Multiscan Process [In SaaS Only]: Control scan process to allow/disallow multiple email scan verifications state.
- Blacklist Monitor: Control blacklist monitoring feature of installed host.
- Script Updates Monitor: Receive notification on script available updates.
- Support Panel: Add a custom button.
- Debug –
- System Log: Enable to start monitoring all debug log related to system.
- Scan Log: Enable to start monitoring all debug log related to email scan validations.
- SMTP Log: Enable to start monitoring all debug log related to outgoing emails over SMTP connection.
- Theme Settings –
- Frontend Template: Activate default template on root path of script installed location.
- Panel BG-Color: Change global color of panel.
- Notification Settings –
- System Email Address: Assign a system email address and smtp connections (optional) for system related outgoing emails.
- Use SMTP: Either use SMTP or Local Mail Exchange.
- SMTP Host: Set SMTP server host.
- SMTP Port: Usable value – 25 or 465 or 587
- SMTP Security: Usable value – ssl or tls or starttls
- SMTP AUTH?: Usable value – true or false
- SMTP Username: Generally same email as System Email Address.
- SMTP Password: Set password of SMTP Host Username.
- SMTP SSL Verification: usable value – true or false
- Connection Test: Allows you to test SMTP Connection.
EMAIL SCANNER #
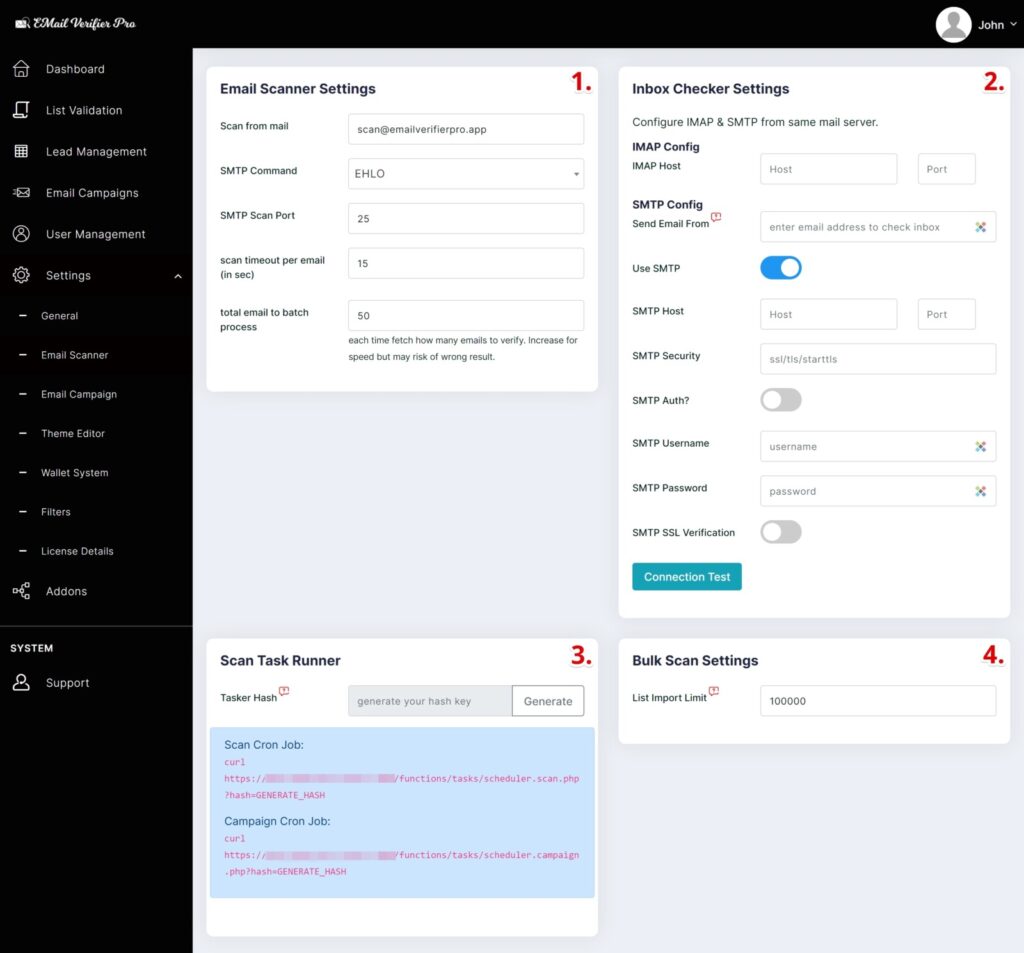
- Email Scanner Settings –
- Scan from mail: Set an email address created on local host machine smtp server.
- SMTP Command: Select either HELO or EHLO to initiates the SMTP session conversation.
- SMTP Scan Port: Default to 25
- Scan Timeout Per Email: Exit SMTP session if fails to connect longer then this value. Default to 15
- Total Email To batch Process: Get 50 emails each time to send on SMTP session. Default to 50
- Inbox Checker Settings – Configure IMAP & SMTP from same mail server or can be used with any transactional SMTP server.
- SMTP Errors: Add custom error string returns from bounce email.
- IMAP Host: Set imap host address
- IMAP Port: Usable value – 143 or 993
- Send Email From: Set Email address which will be used from SMTP host server to send bulk dummy email.
- Use SMTP: Either use SMTP or Local Mail Exchange.
- SMTP Host: Set SMTP server host.
- SMTP Port: Usable value – 25 or 465 or 587
- SMTP Security: Usable value – ssl or tls or starttls
- SMTP AUTH?: Usable value – true or false
- SMTP Username: Generally same email as System Email Address.
- SMTP Password: Set password of SMTP Host Username.
- SMTP SSL Verification: usable value – true or false
- Connection Test: Allows you to test SMTP Connection.
- Scan Task Runner –
- Tasker Hash: Security hash key to access cron job scheduled tasks. Needs to be added in server cron job.
Scan Cron Job Time: Every minute. (recommended)
Campaign Cron Job Time: Every Hour. (suggested)
- Tasker Hash: Security hash key to access cron job scheduled tasks. Needs to be added in server cron job.
- Bulk Scan Settings –
- List Import Limit [In SaaS Only]: Assign a csv data row limit on each import. Default to 100,000
- List Import Limit [In SaaS Only]: Assign a csv data row limit on each import. Default to 100,000
- Inbox Checker –
- Dummy Emails: Add your custom dummy emails to be randomly used for sending with inbox checker feature. Keep it simple just to check email box directly.
EMAIL CAMPAIGN #
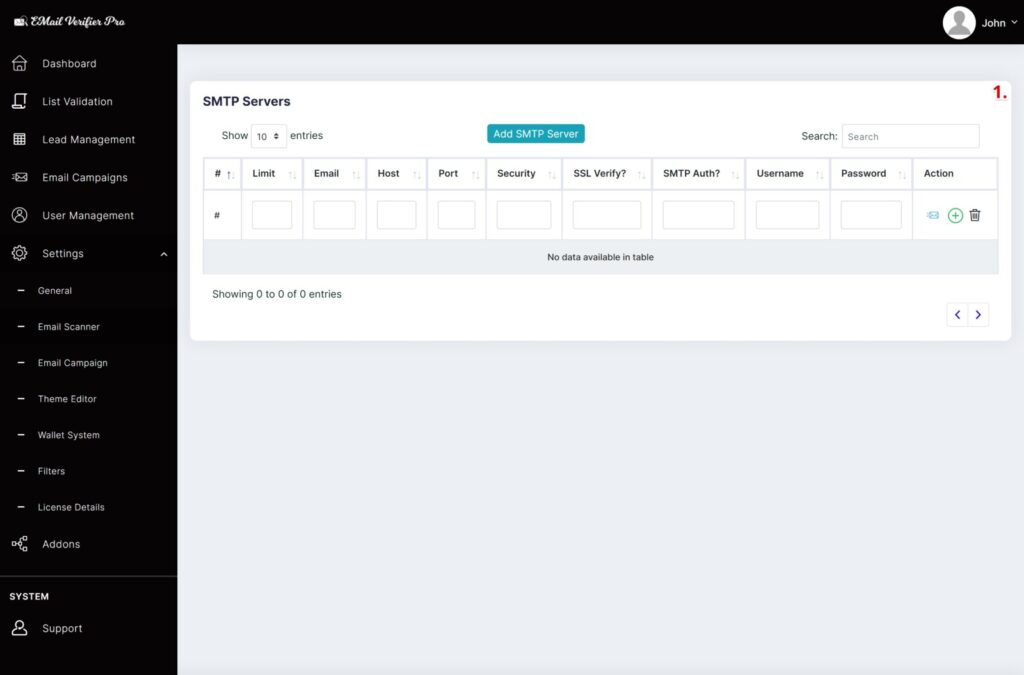
- SMTP Servers –
- Add SMTP Server: Add multiple SMTP servers to use for Email Campaign. Each server can be selected manually each time from Email Campaign.Limit: Set email amount to be send on every campaign cron job call.Email: Set Email address which will be used from SMTP host server to send bulk campaign email.Host: Set SMTP server host.Port: Usable value – 25 or 465 or 587Security: Usable value – ssl or tls or starttlsSSL Verify?: usable value – true or false
- SMTP AUTH?: Usable value – true or false
- Username: Generally same as Email
- Password: Set password of SMTP Host Username.
- Action: Data Add, Edit, Delete, Connection Test
THEME EDITOR #
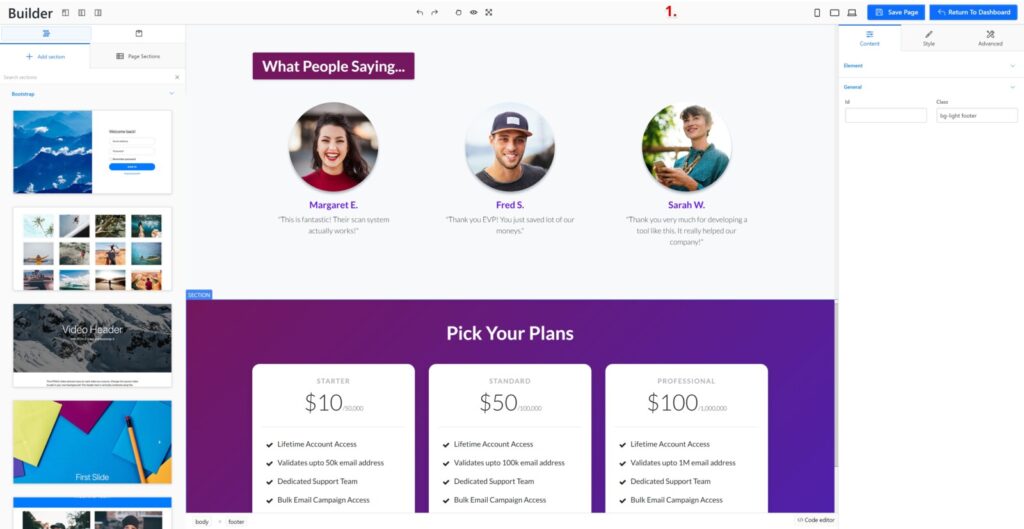
- Theme Editor –
- Allows you to modify script front end default template.
WALLET SYSTEM [In SaaS Only] #
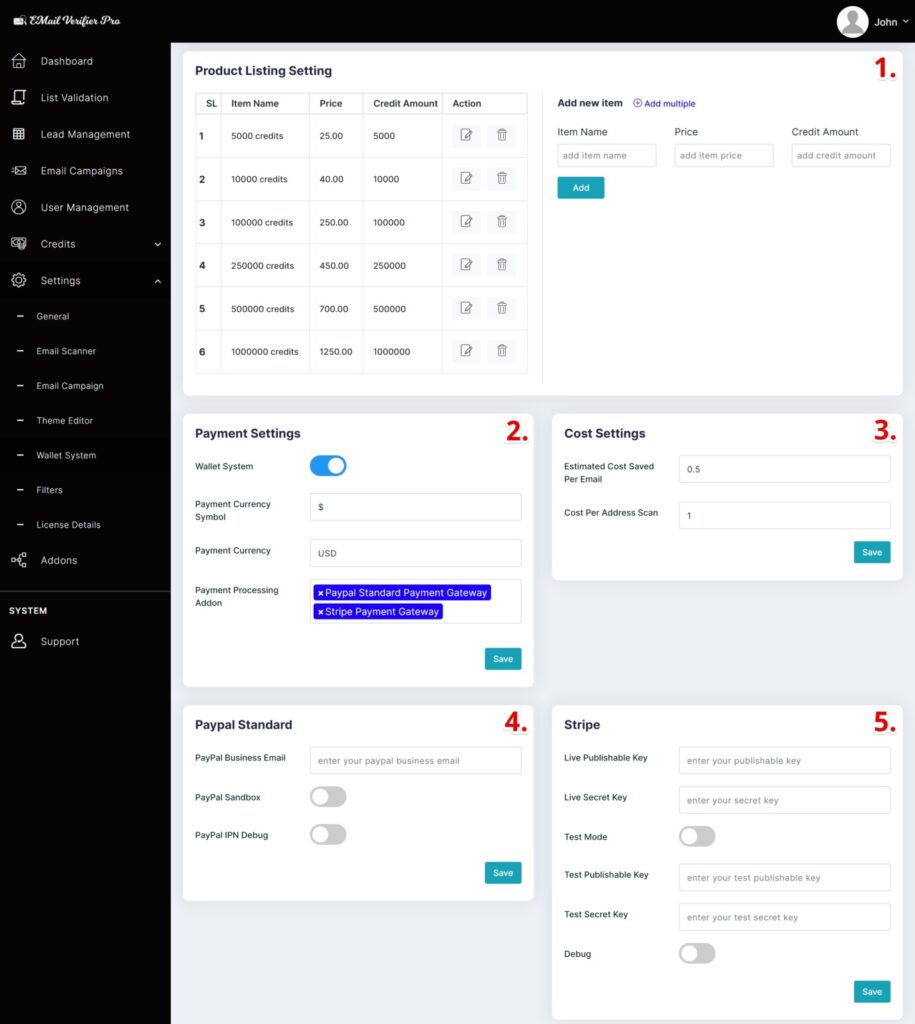
- Product Listing Setting –
- Add new products item or modify existing products data.
- Add new products item or modify existing products data.
- Payment Settings –
- Wallet System: Enable/Disable wallet system to be free or cost on each scan.
- Payment Currency Symbol: Set your payment currency. Default to $
- Payment Currency: Payment will be charged on this currency. Default to USD
- Payment Processing Addon: Select available payment gateways.
- Cost Settings –
- Estimated Cost Saved Per Email: Default to 0.5
- Cost Per Address Scan: Default to 1
- Paypal Standard Standard [Addon] –
- PayPal Business Email: Set your paypal business email.
- PayPal Sandbox: Enable/Disable paypal sandbox option.
- PayPal IPN Debug: Enable/Disable paypal IPN Debug logging.
- Stripe –
- Live Publishable Key: Set your publishable key from stripe
- Live Secret key: Set your secret key from stripe
- Test Mode: Activate stripe gateway as test mode
- Test Publishable Key: Set your test publishable key from stripe
- Test Secret Key: Set your test secret key from stripe
- Debug: Enable/Disable Stripe Gateway debug logging.
- Web3 Wallet –
Each currency network settings can be obtained from chainlist.org . Use only primary currency, (no tokens) and network.- RPC Url: network rpc url
- Chain Id: network chain id number
- Currency: example -> bnb
- Gas Limit: present gas limit
- Gas Price: present gas price
- Float Precision: float precision
- Payout Wallet Address: your wallet address to receive payment
- Payment Server API Key: secret api key to check payment
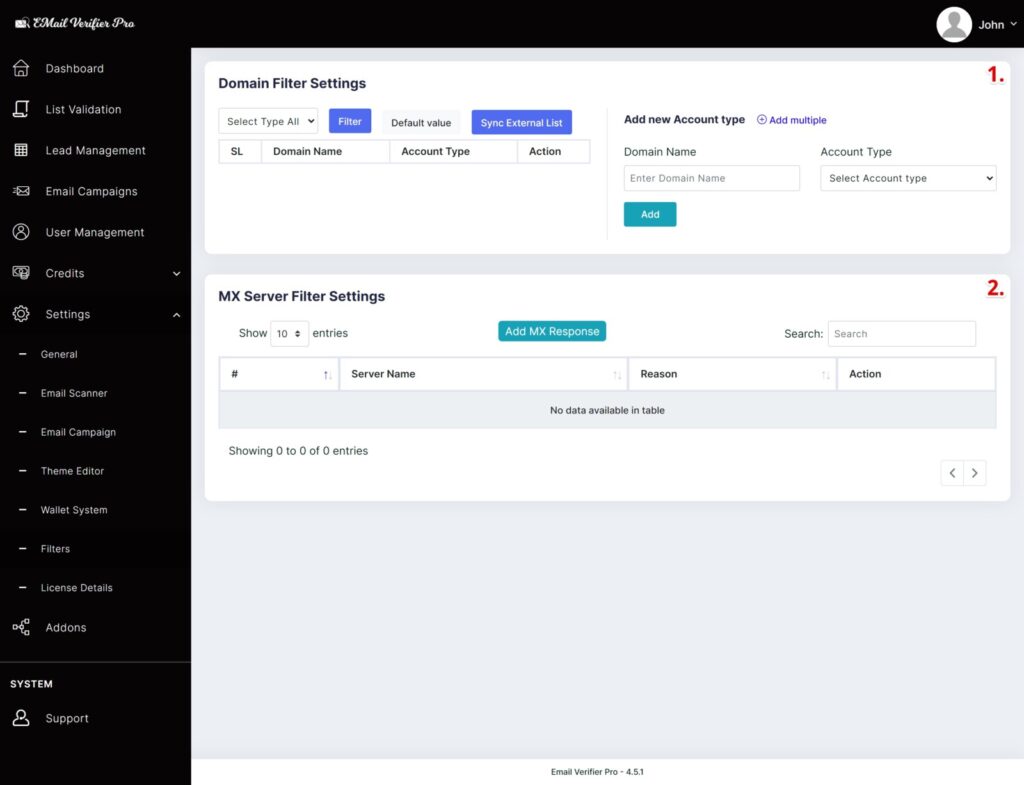
- Domain Filter Settings –
- Add or manage existing domain filters. This filtering option gets use to assign existing records to scanning list.
- Add or manage existing domain filters. This filtering option gets use to assign existing records to scanning list.
- MX Server Filter Settings –
- SMTP failed or server fail response email MX Server will be stored here. On next scan these MX Server emails get skipped directly instead of making a connection. It is possible to add your own MX Server list here and managing existing bad server.
LICENSE DETAILS #
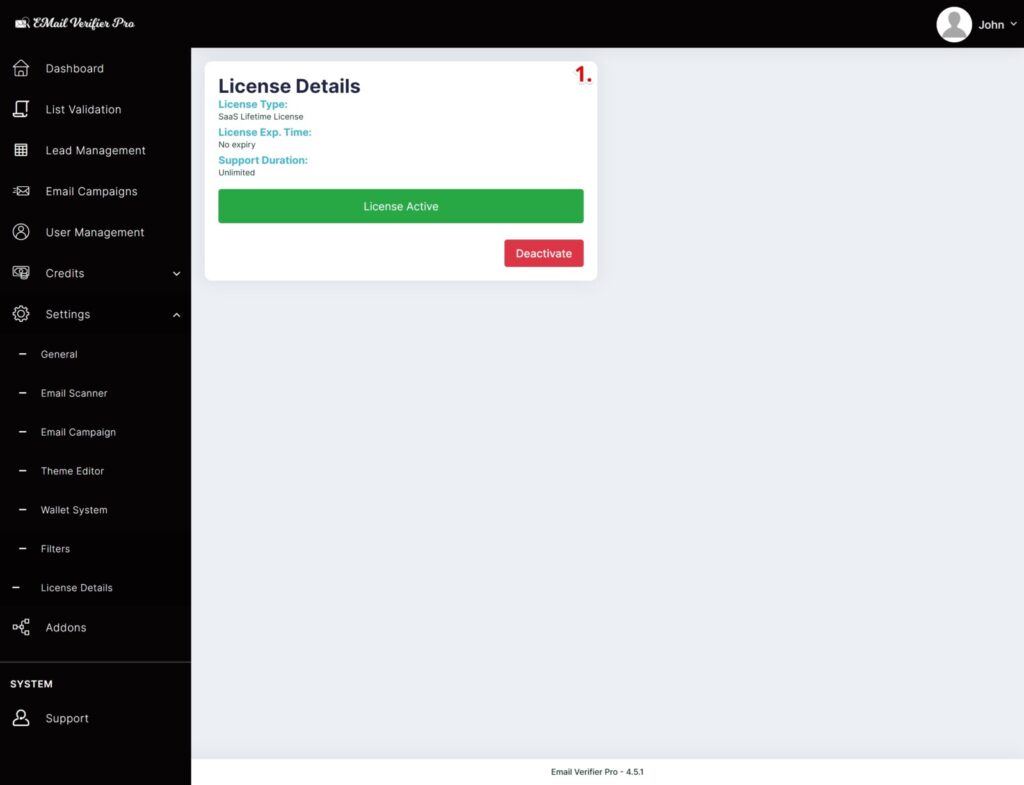
- License Details –
- Purchased license details visible here. Can be activate / deactivate.


Leave a Reply
You must be logged in to post a comment.